Category Archives: Pickleball Courts

How To Properly Prepare Concrete For Sport Surfacing Athletic Courts

Athletic & recreational courts (tennis, pickleball, basketball, etc.) are built from either asphalt or concrete pavement.  The type of substrate used is normally determined by region, cost, preference, availability or site access.

Each substrate (asphalt or concrete) has its own set of requirements, when it comes to application of acrylic sport surfaces.  This bulletin will discuss how to properly prepare concrete for sport surfacing athletic courts.

Concrete Court Construction

When it comes to proper concrete court construction, there is a long “to-do” list.  As with anything, there is always a good, better, best list of what to do and why it is important.  If you are considering having a recreational court built, we recommend getting a copy of the American Sports Builders Association’s construction & maintenance manual.  They publish and sell these for tennis or pickleball, which is also useful for basketball and other sports.  That being said, we will reference a short list of the most important factors, prior to application of acrylic surfaces.

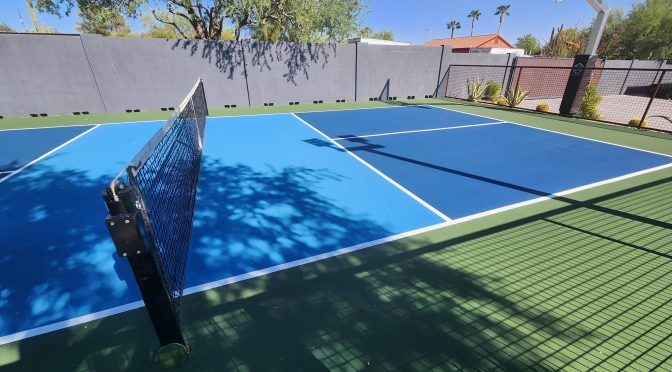
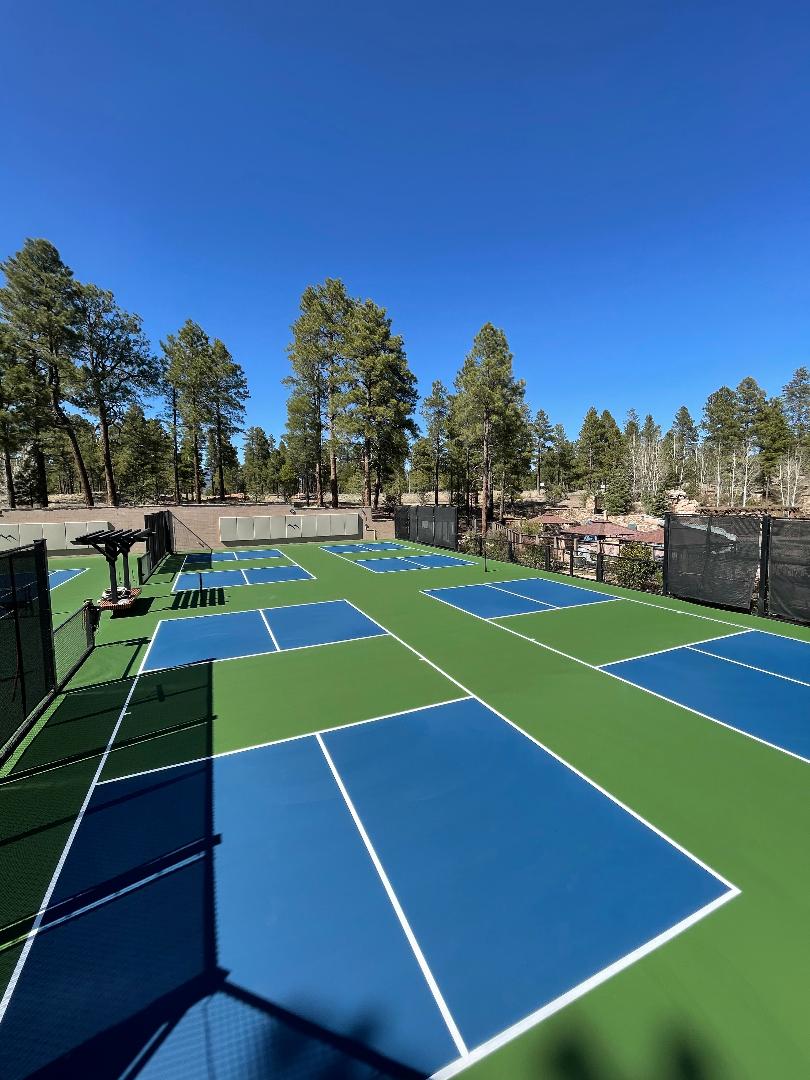
New Concrete Pickleball Court

Install Vapor Barrier

Prior to pouring the concrete slab, a vapor barrier should be installed to prevent upward migration of ground moisture.  This normally consists of two sheets of 6 mil polyethylene plastic sheeting, laid in opposite directions.  Make sure it is overlapped and taped at the joints.  The vapor barrier is on top of the stone base and under the concrete slab.

Ensure Adequate Perimeter Drainage & Slope

Another very important factor, when trying to minimize water accumulation under the concrete slab, is good perimeter drainage.  If one or both of these items are lacking (vapor barrier & perimeter drainage), your court surface could be in danger of bubbles or blisters in the coating.  In most cases, this will lead to peeling of coatings and bare spots down to the concrete.  Court surfaces should be sloped at 1% in one direction, which is 1″ fall in every 10 feet.  This helps to keep water flowing off the court and ensures fast drying surfaces and less standing water.

Medium-broom Finish or Similar Surface Texture

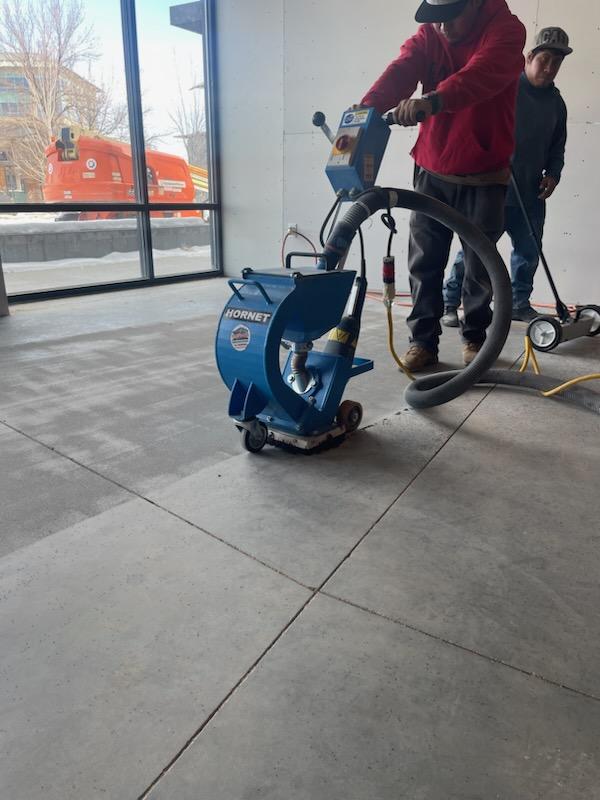
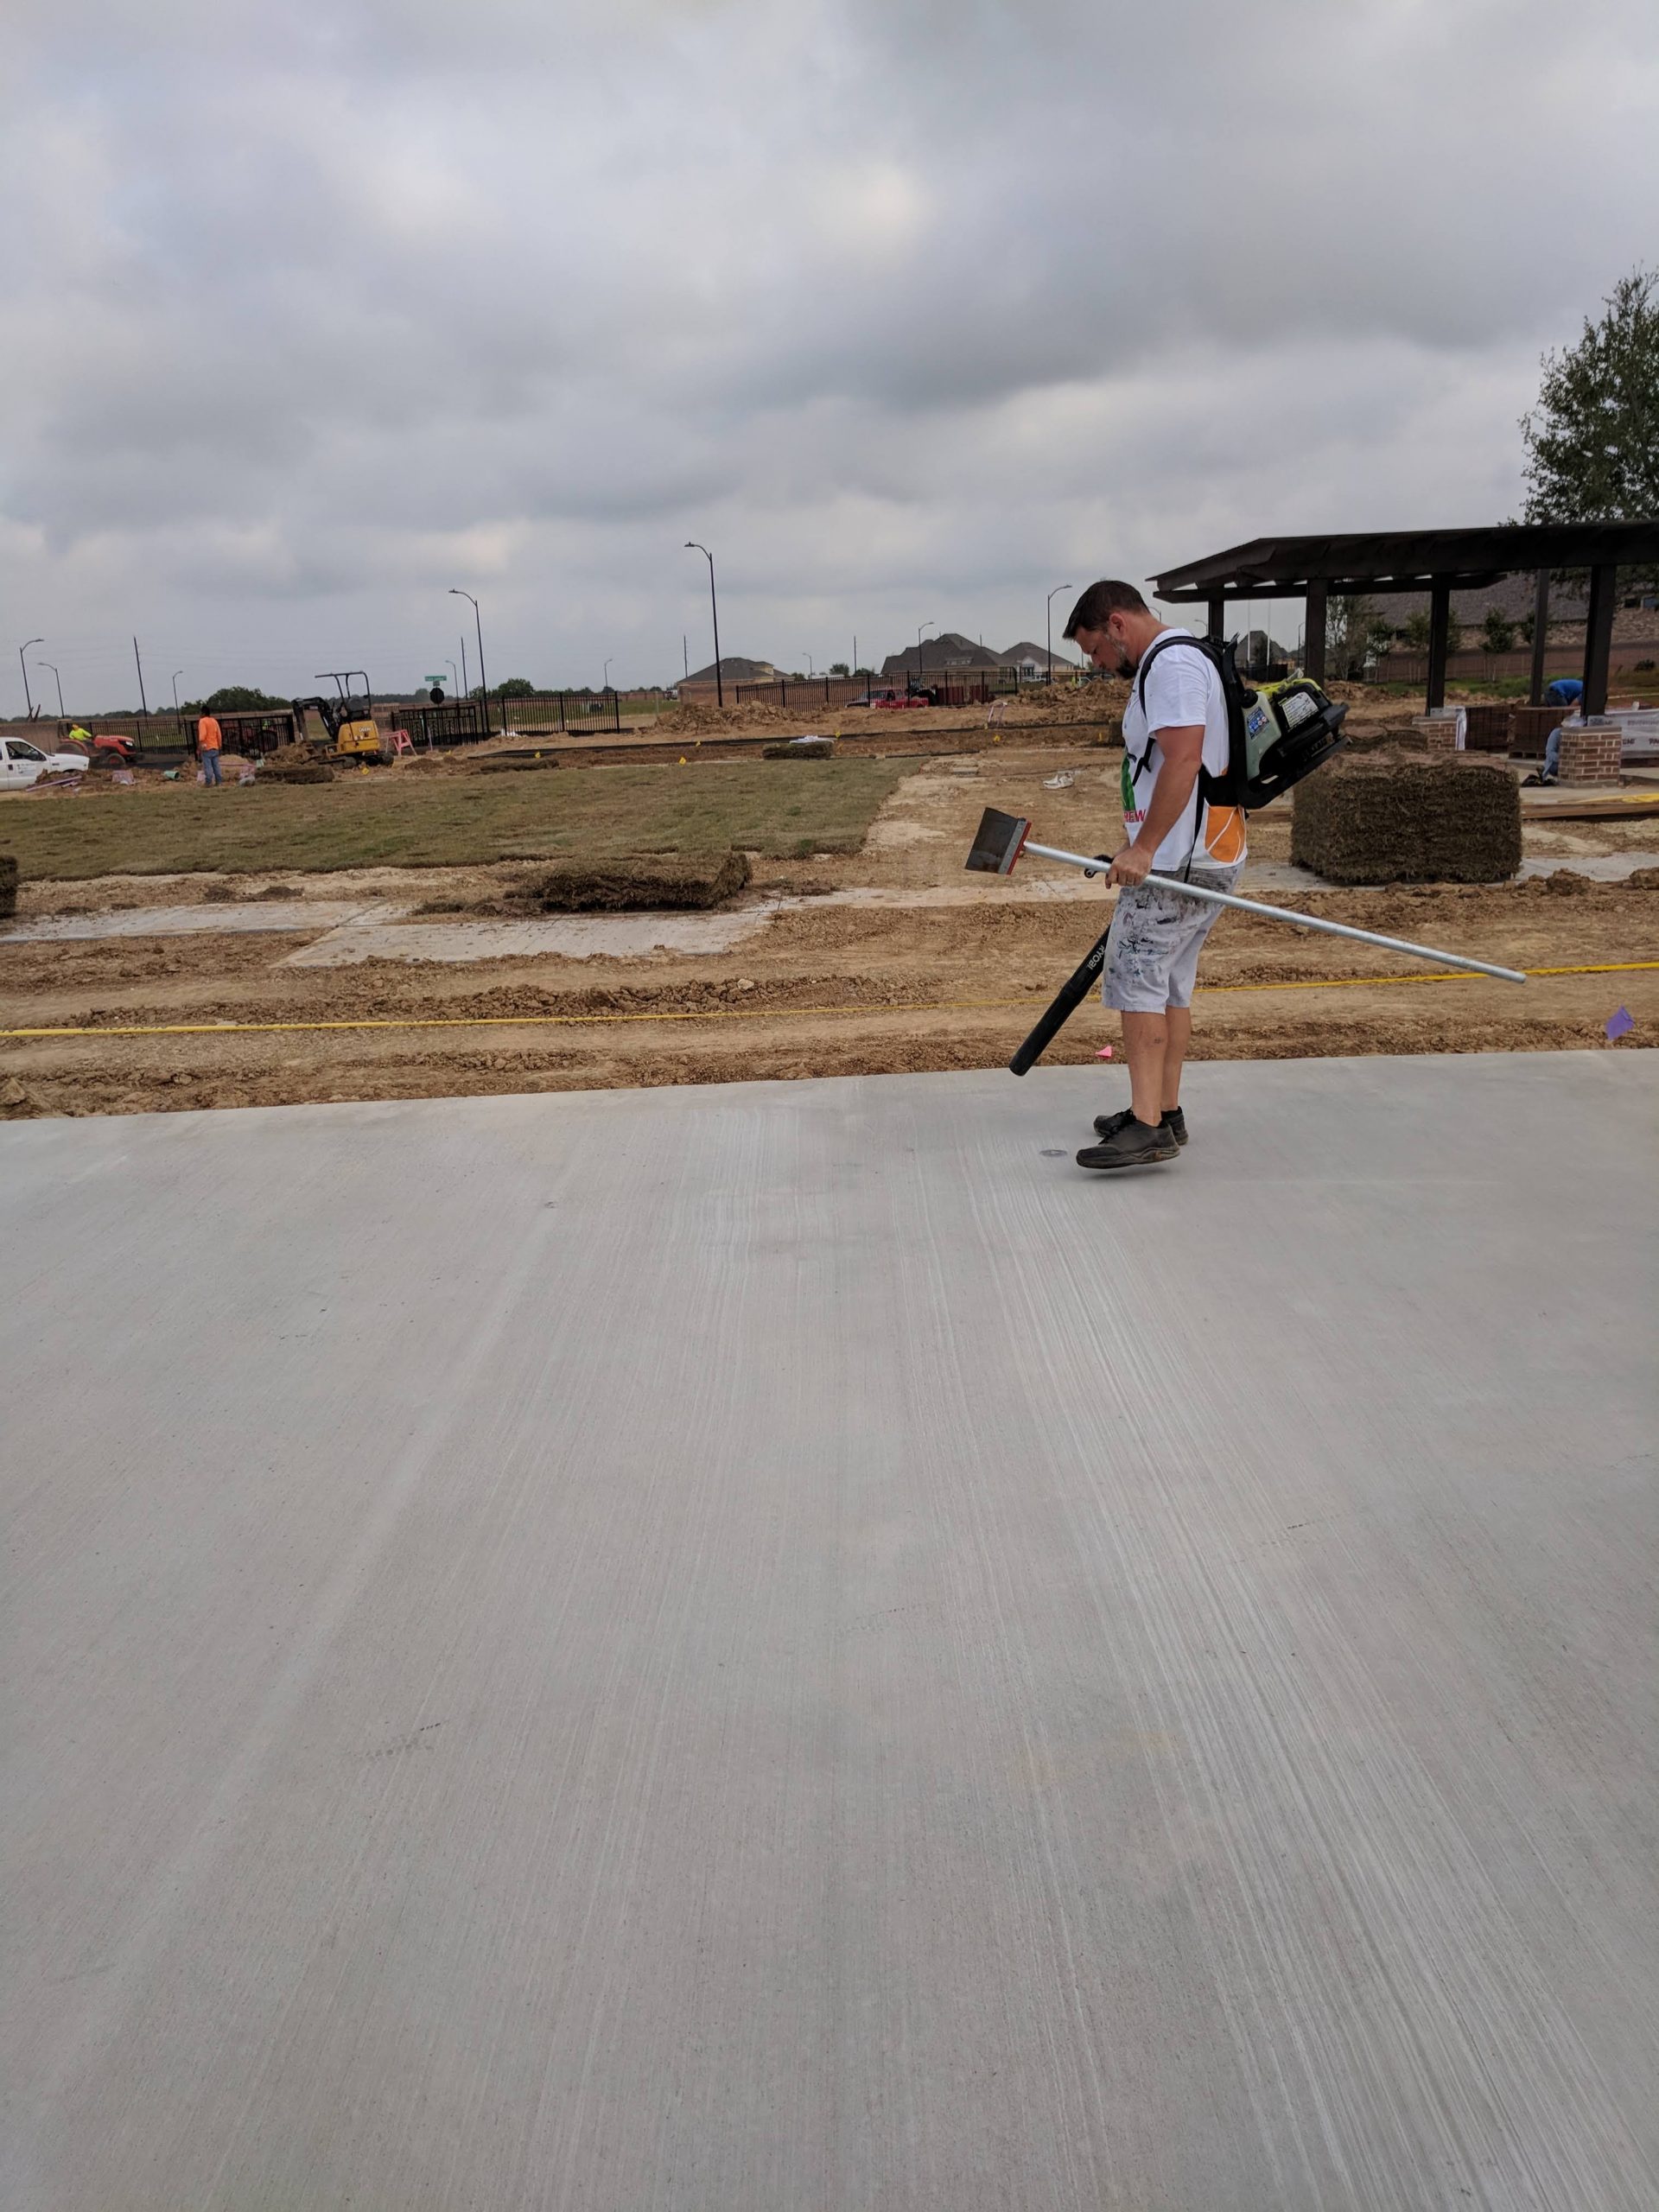
When pouring and finishing the concrete, make sure that the concrete contractor applies a medium-broom finish on the surface of the concrete.  This is very important to a good physical bond of the sport coatings.  A steel-troweled finish is too smooth and will also raise the chances of peeling surfaces.  If the concrete is already in place and doesn’t have a medium-broom finish, you can use specialized equipment to achieve sufficient texture.  The most commonly used piece of equipment is a shot blaster.  For more information, check out our dedicated page on shot blasting concrete court surfaces.

Medium Broom Finish Concrete Court
Medium Broom Finished Concrete Court

Allow Full Cure Before Coating Application

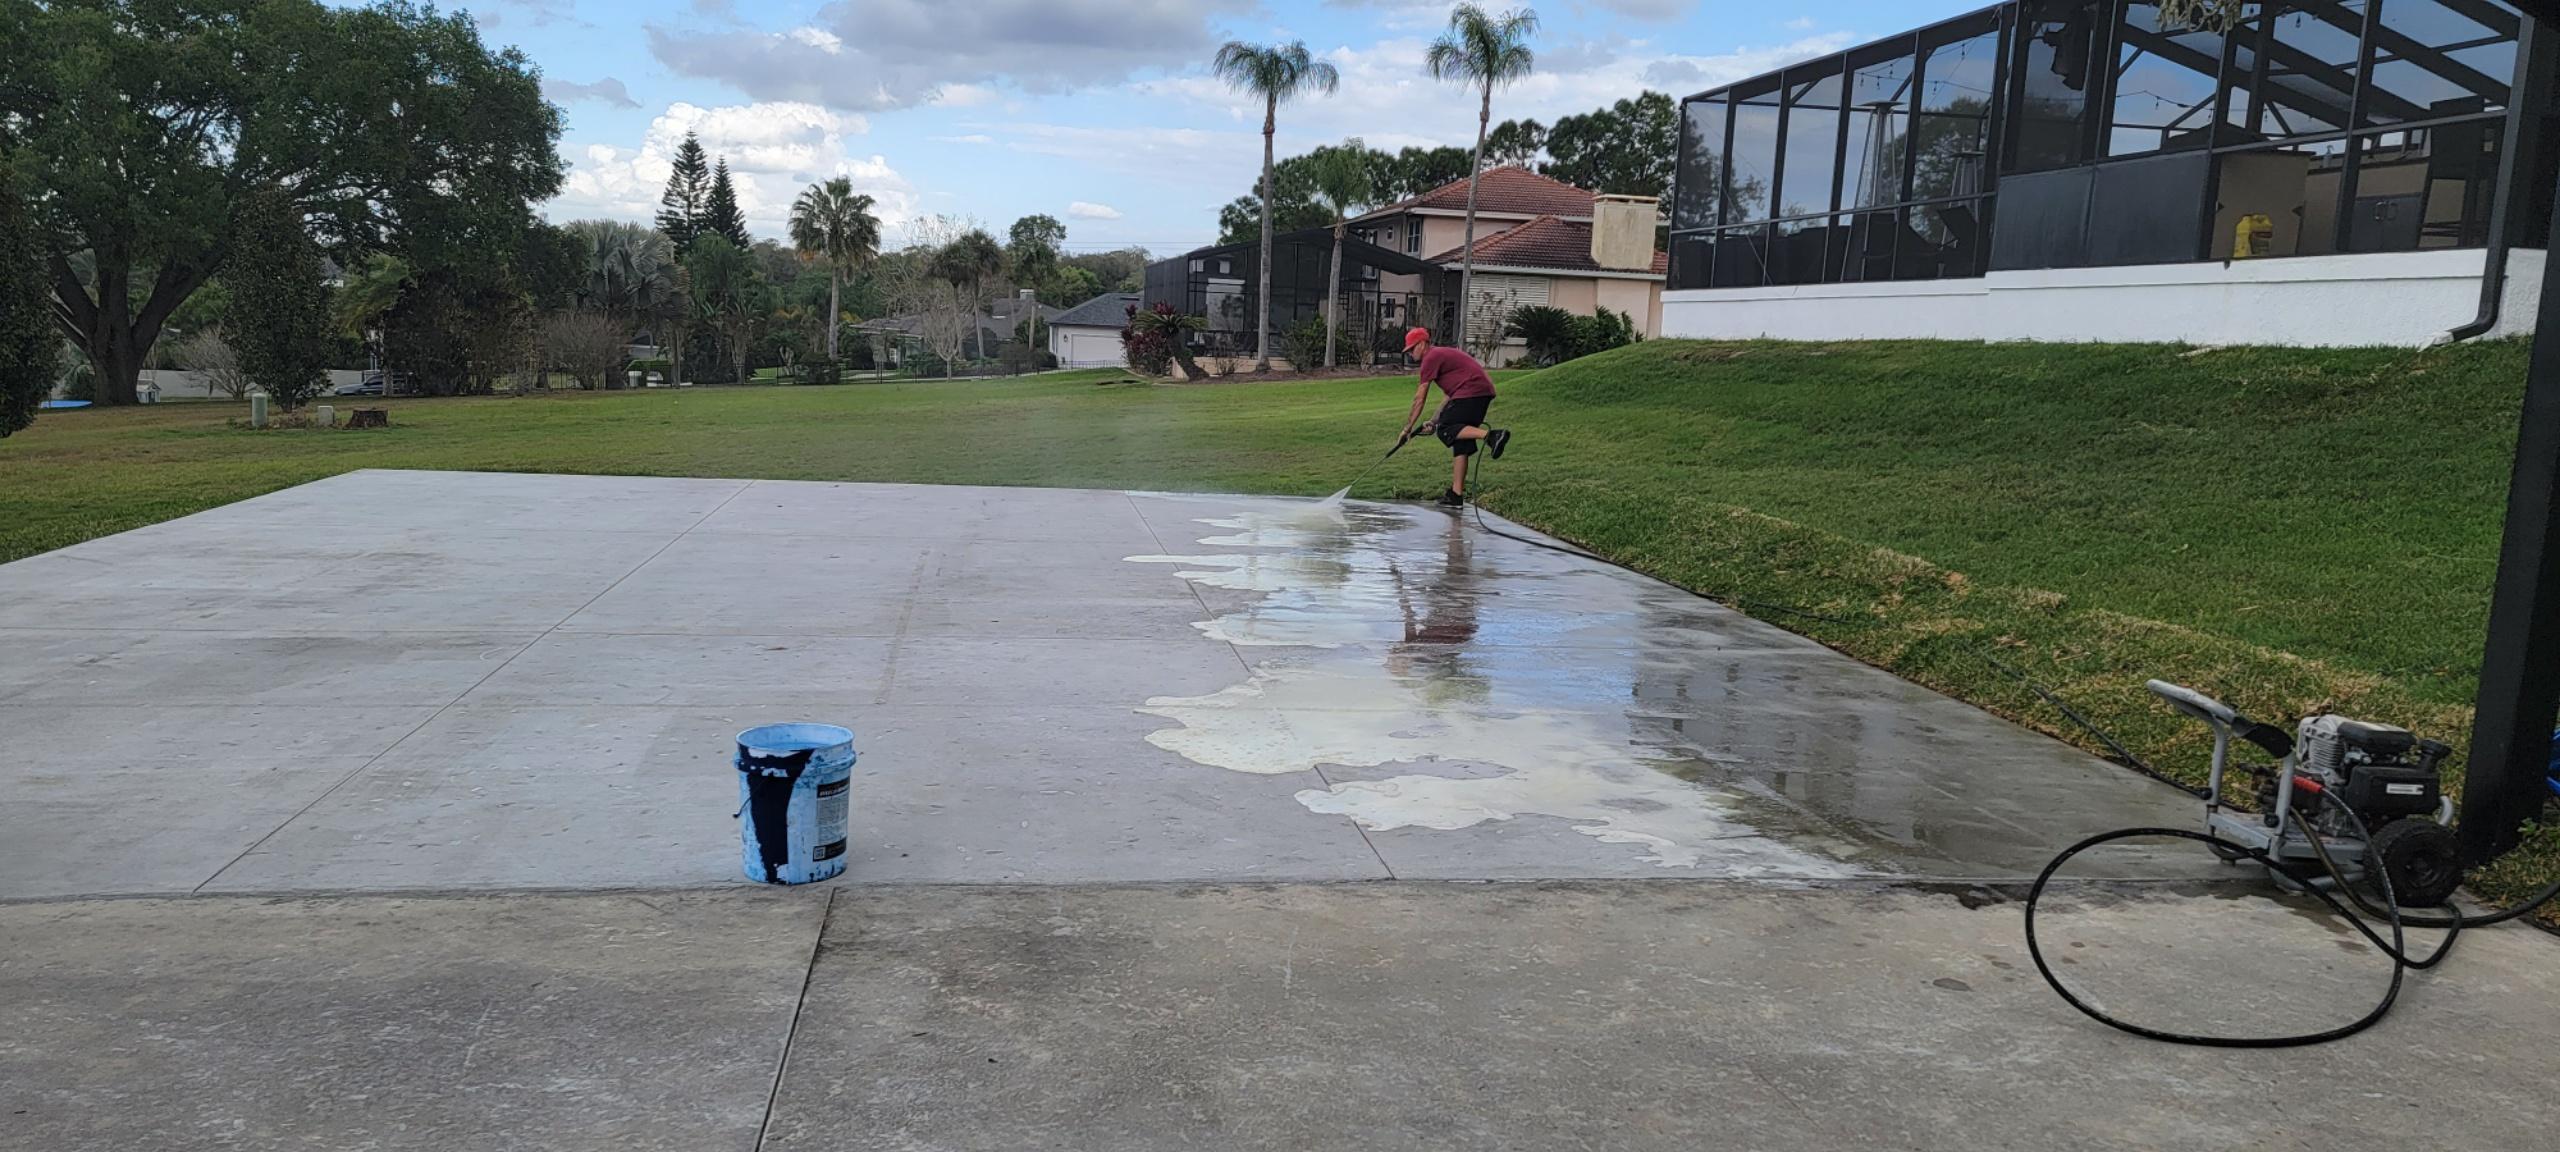
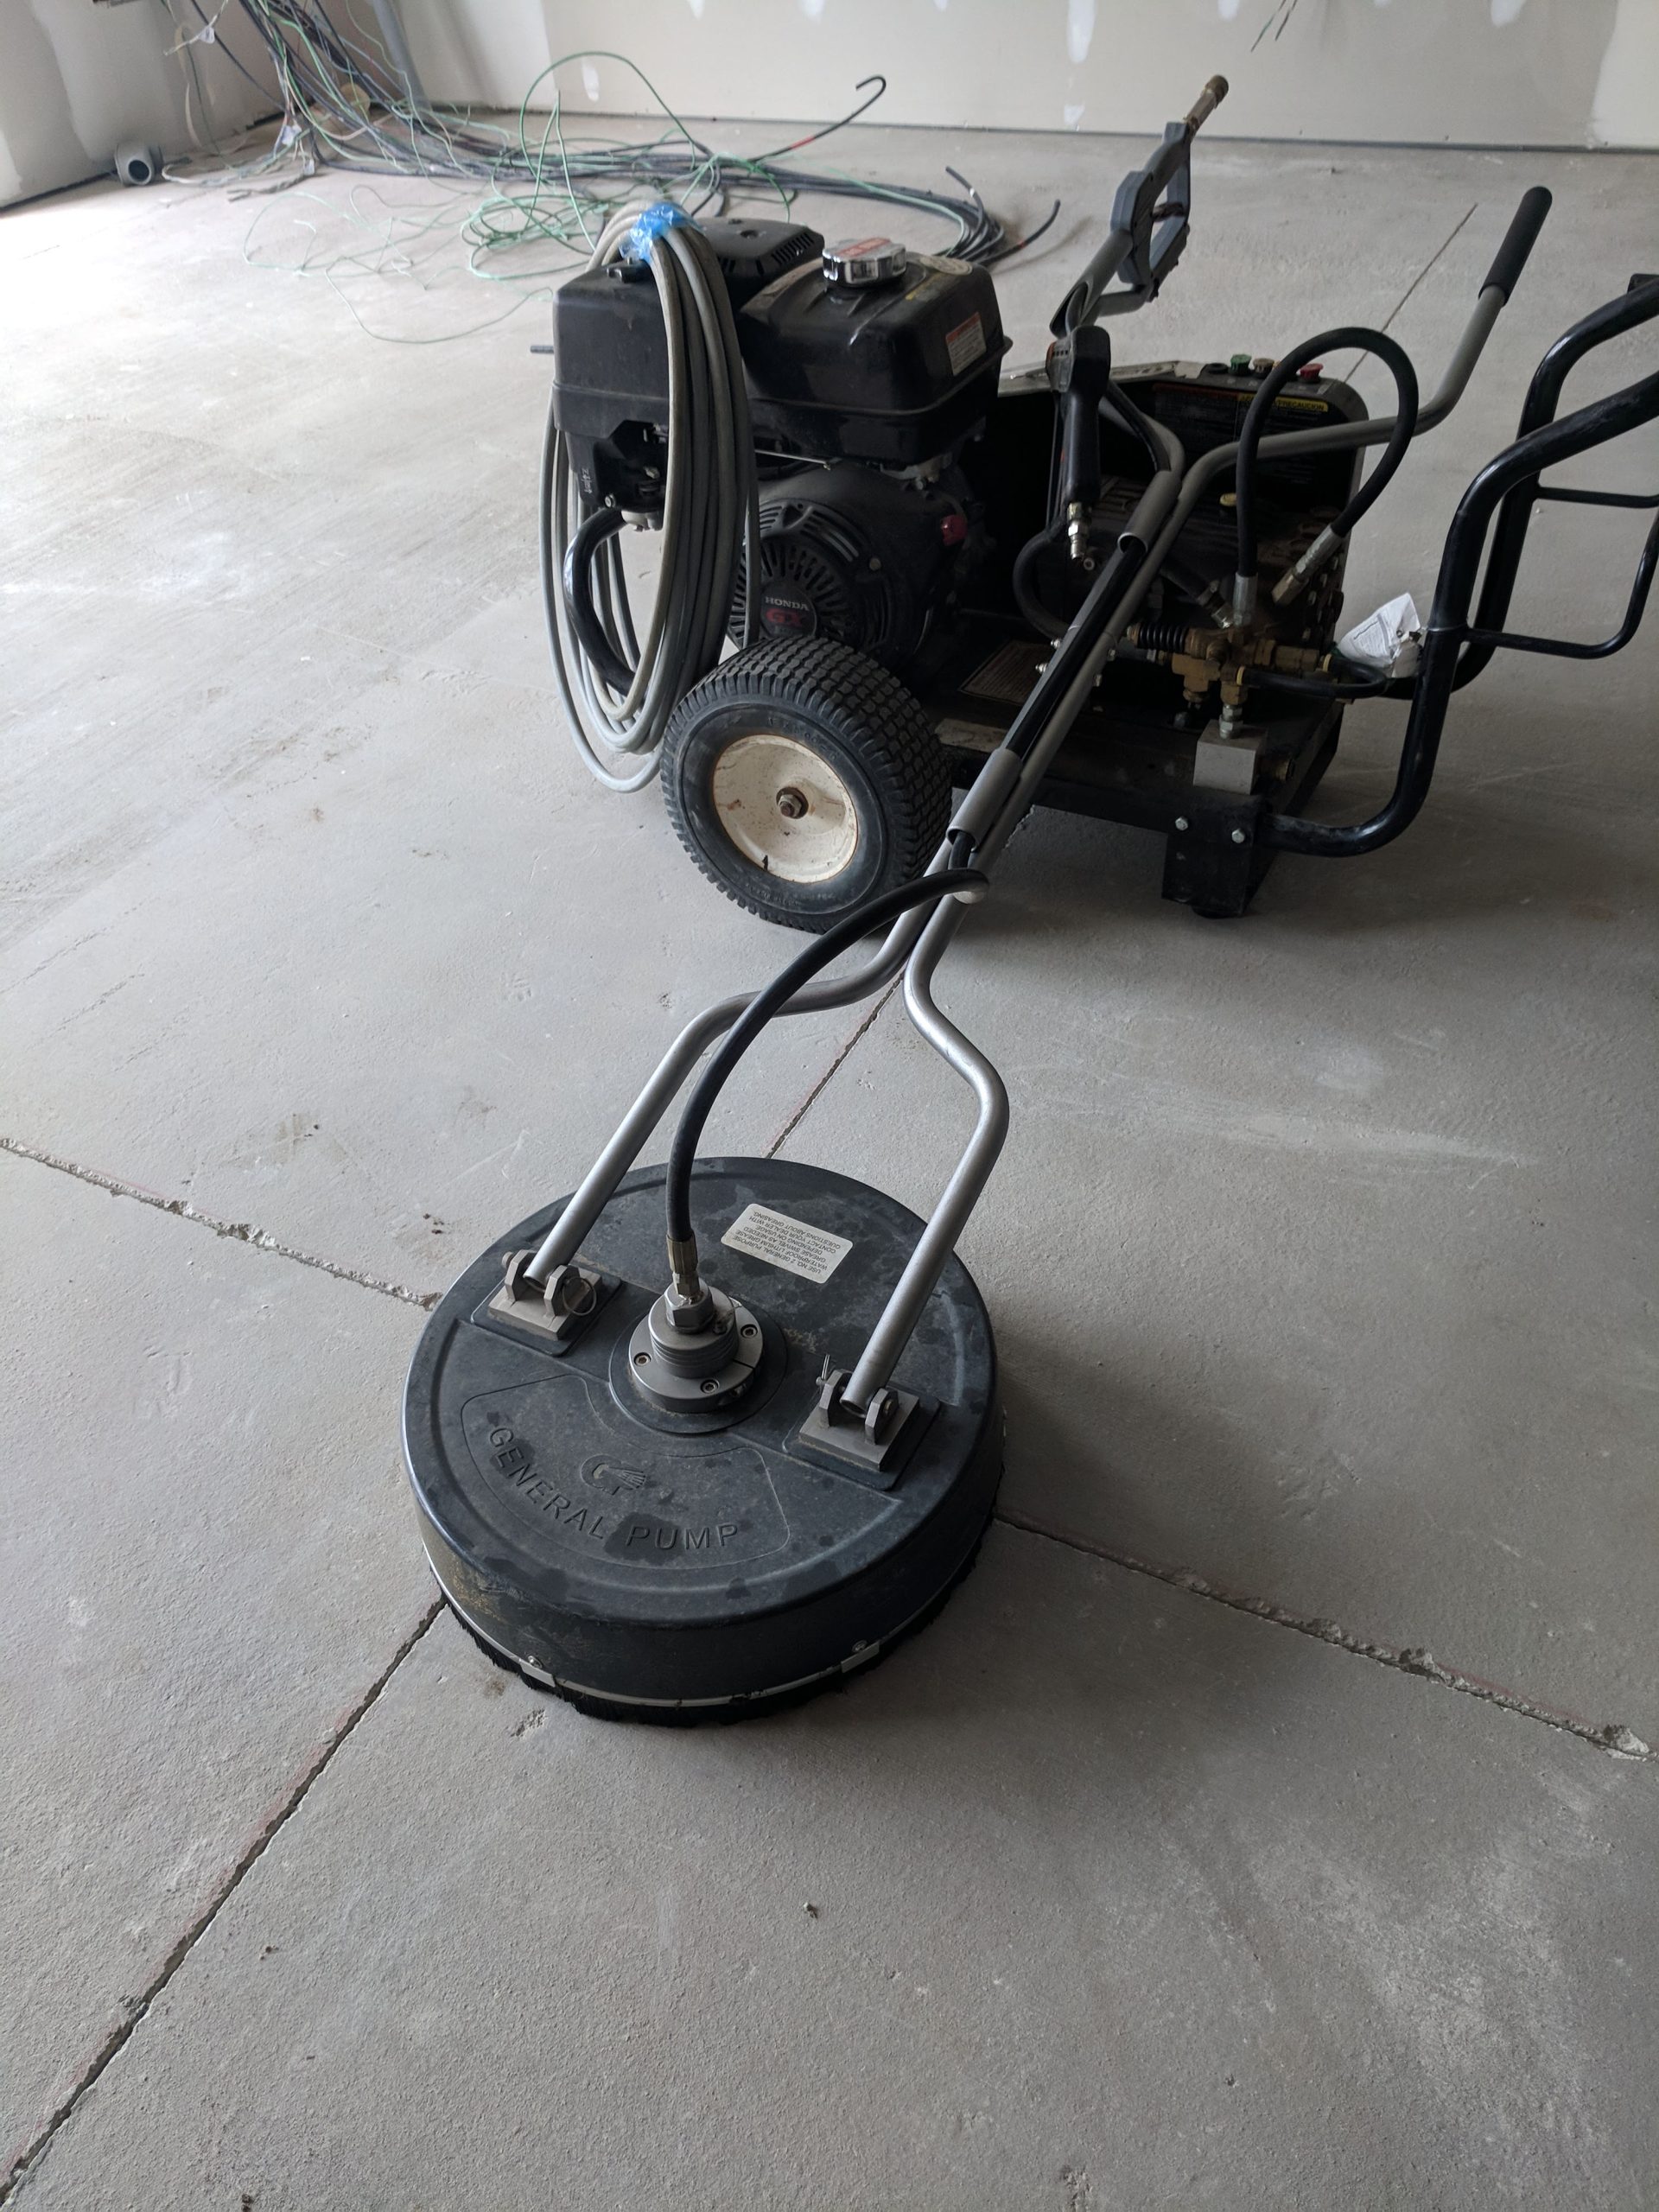
The curing process of concrete is a chemical reaction that takes 28 days to complete.  During the process, quite a bit of water is escaping from the slab and depositing high-alkaline salts on the surface.  It is important to allow a full 28 day minimum cure, prior to moving forward with coating application.  Also, after the full cure and prior to application of coatings, the concrete slab must be acid etched (or acid washed).  This helps to create a neutral PH on the surface for an ideal chemical bond of coatings.  This is fully explained on our page, acid etching concrete sport surfaces.

One more note on curing, avoid using curing compounds on concrete court surfaces.  Once the concrete is poured, it will instantly begin to losing water via evaporation.  If the temperatures are hot, water will leave the wet slab quickly, and this could lead to surface cracking (like mud cracking in a puddle).  To prevent this, most concrete contractors spray curing compounds on the surface to slow down the evaporation of water.  Many curing compounds are made up of oil based or incompatible materials that can leave a residue on the the concrete surface.  This residue, or film, can potentially cause a bond breaker and lead to failure of the acrylic sport coatings.  To avoid this situation, make sure the concrete contractor moisture cures the slab.  This is performed by keeping the slab wet after pouring, with a covering of moistened burlap, a polyethylene sheet, or other curing paper.  After 7 to 10 days, it can be allowed to dry and cure under normal conditions without the keeping the slab moist.

Not sure if curing compounds have been used, or you know they have been used?  The surface can be shot blasted to remove any bond-breaking films.  Note, you can pour a small amount of water onto the concrete slab to see if water beads up on the surface.  If it does, there is likely a curing compound or sealant on the surface.

Application Of Concrete Primer & Sport Surfaces

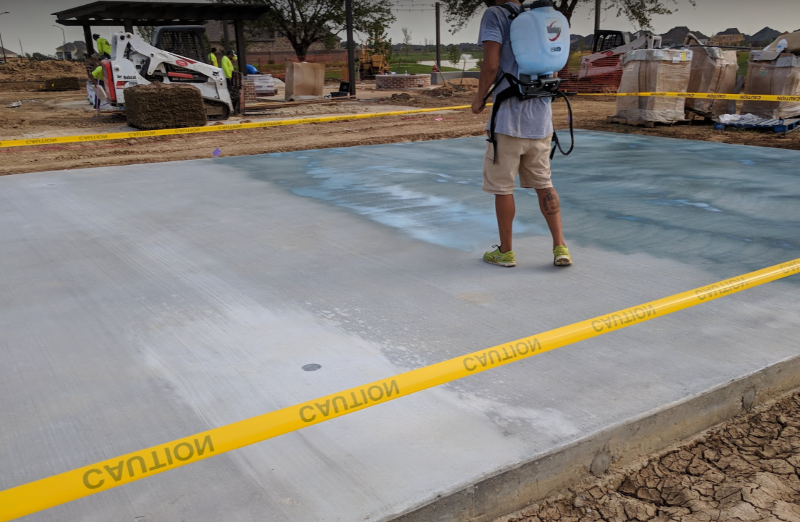
At this point, the concrete slab should be ready to receive the sport surfacing system.  Once the surface is clean and dry, apply one coat of SportMaster Acrylic Adhesion Promoter.  This product acts as a concrete primer and helps the SportMaster color coating system adhere to the concrete.  It also helps to lock down potential concrete powder, or efflorescence,  that may migrate into the color coating “paint” layers and leave a hazy color hue.

Concrete Primer for Sport Surface
Acrylic Adhesion Promoter being applied on concrete court surface

After the Acrylic Adhesion Promoter dries, Acrylic Resurfacer and the colored surface coatings can be applied.  There is no special timing required with Acrylic Adhesion Promoter.  The successive coatings can be applied as soon as it is dry to the touch, or on another day thereafter.

One or two coats of Acrylic Resurfacer is usually sufficient to fill broom patterns and concrete surface texture on a new concrete court surface.  Follow that with SportMaster color coatings, 2 coats minimum, and striping to complete the new concrete recreational court surfacing.

New Concrete Pickleball Surface Preparation

Asphalt Impurities & Clay Balls on Sports Court Surfaces

Another common issue seen on athletic court surfaces arises from asphalt impurities, most commonly clay balls.  In this bulletin, we will explain the occurrence of asphalt impurities & clay balls on sports court surfaces.  

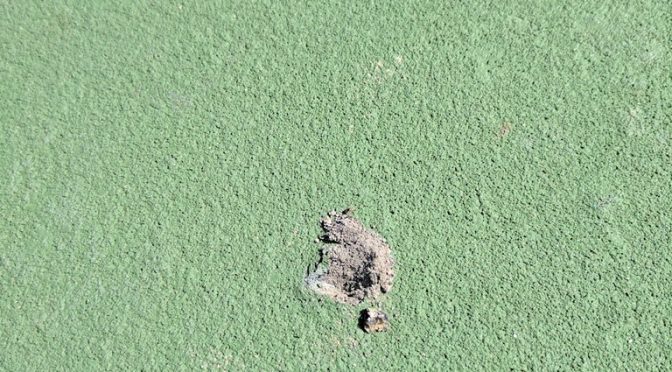
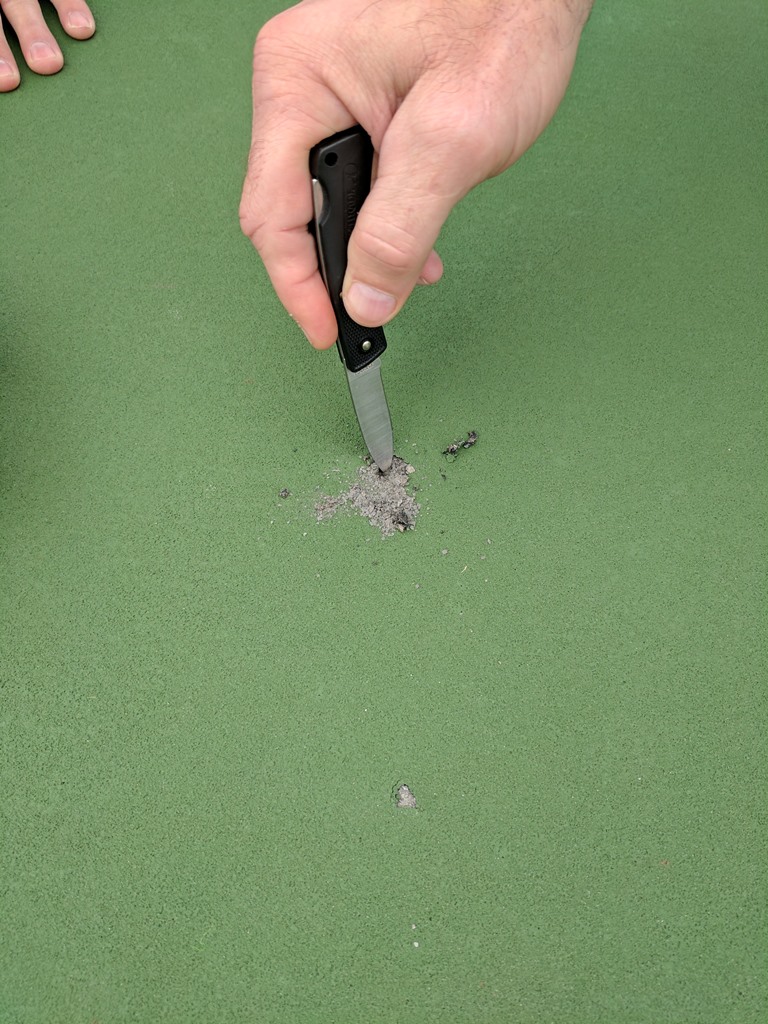
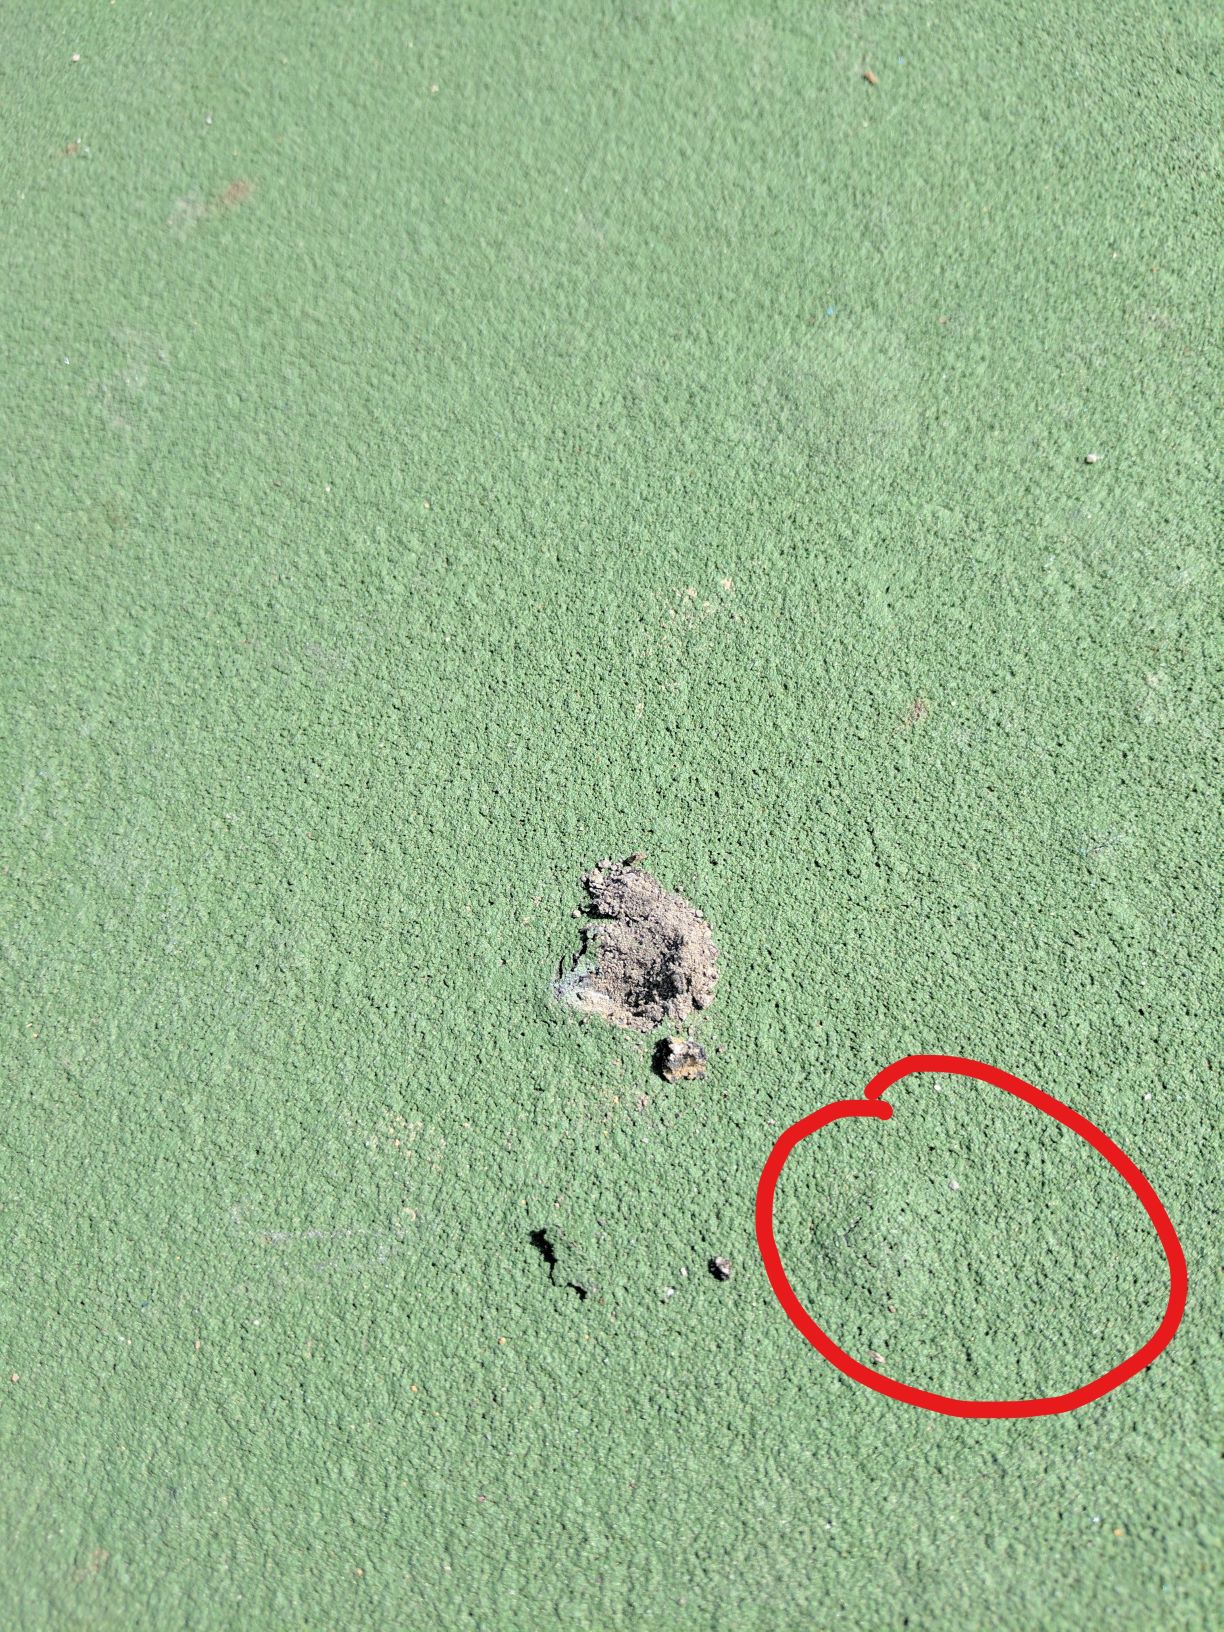
The appearance of clay balls begin with small bumps that appear in random areas of the court surface.  When you push on these bumps, they feel hard and do not give.  If you carefully cut into the bumps, you should discover a small pile that looks like ash.

How to clay ball deposits get below the court surface?

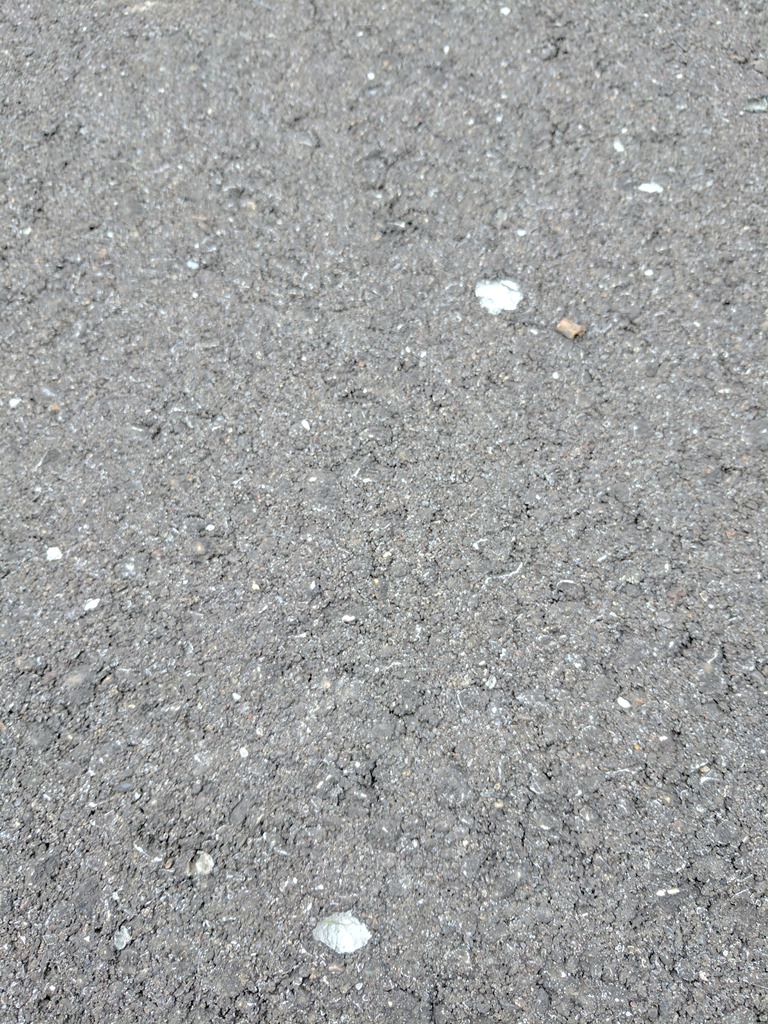
Asphalt is made up of rock (mostly limestone, with some other aggregates).  It is held together by asphalt binder, derived from the oil refining process.  Clay deposits are naturally occurring, and heavier in certain regions throughout the ground and rock quarries.  When excavating the limestone, it is impossible to remove 100% of the clay that is laced within.  As shown in the picture below, you can see random pockets of clay in the uncoated asphalt voids.

Why do the court surface bumps appear?

Asphalt is a porous pavement and will allow sub-surface moisture to breathe through it.  Acrylic sport surfacing systems are semi-permeable and will also allow a moderate amount of moisture to breathe through and escape.  Properly constructed courts should be pitched at 1% for drainage, but there is still ground moisture that travels up through the slab.  When the surface of the court is heated from the sun, it draws moisture up from beneath the court in a vapor state.  As the moisture is migrating through the asphalt,  it is absorbed into the clay deposits and the acrylic surfacing layers slow down the escape.  During the process, the clay balls swell and create the visible lumps on the surface.

Clay Ball Bumps On Sport Surface

How to remove clay balls from court surface

So, how do you remedy the situation and remove clay balls from the court surface?  This is usually just an aesthetic issue and normally not a problem that will affect play and the ball bounce.  If it becomes a problem, or when it is time to resurface the court, the following procedures can be performed:

If the clay balls are not creating issues with play and you can wait to remediate the clay balls situation, it will allow time for any potential swelling reactions.  If you do this as soon as it happens, and resurface the court, others may pop up shortly after.  You can remove them as they show up, but you will likely see the touch-up from the different of texture and color.

Avoid Recycled Asphalt For Sport Surfaces

Other asphalt impurities can also create problems with court surfaces.  If possible, avoid using recycled asphalt as it may contain unknown foreign items (i.e. shingles and other various materials).  It is also important to seek out experienced sport construction companies, as they may know what quarries to avoid based on past history of clay deposits and foreign materials.  Contact us for free referrals to qualified installers.


How To Paint A Pickleball Court

As a manufacturer of acrylic sport surfaces, we are frequently asked how to paint a pickleball court.  There are a few different levels and options, when it comes to painting your court, and each will result in different levels of cost and quality.

Option 1 | Painting a Pickleball Court

Acrylic surfacing products are specialized coatings that can be applied on asphalt or concrete surfaces.  These coatings contain silica sand for non-slip texture.  The fine sand  in color coatings will provide surface texture, but not fill the pavement voids very well. If you just apply 2 coats of the textured color coatings, it will look decent, but you will see lots of surface voids and imperfections from the asphalt or concrete beneath.  This will be similar to the surface of an orange peel, where you see the pores.

Option 2 | Resurfacing a Pickleball Court

We are using the term of resurfacing a pickleball court, to refer to the coating process and not resurfacing with pavement.  In order to fill the pavement voids and provide the best prepared surface, generally one to two coats of Acrylic Resurfacer is ideal.  This product is applied prior to the color coatings, and is designed to fill voids and add texture to the asphalt or concrete surface.  Acrylic Resurfacer holds 14 to 15 pounds of sand, per gallon, and will fill the pavement voids to provide a tight, non-porous surface.  This product followed by 2 coats of color will yield the best results.

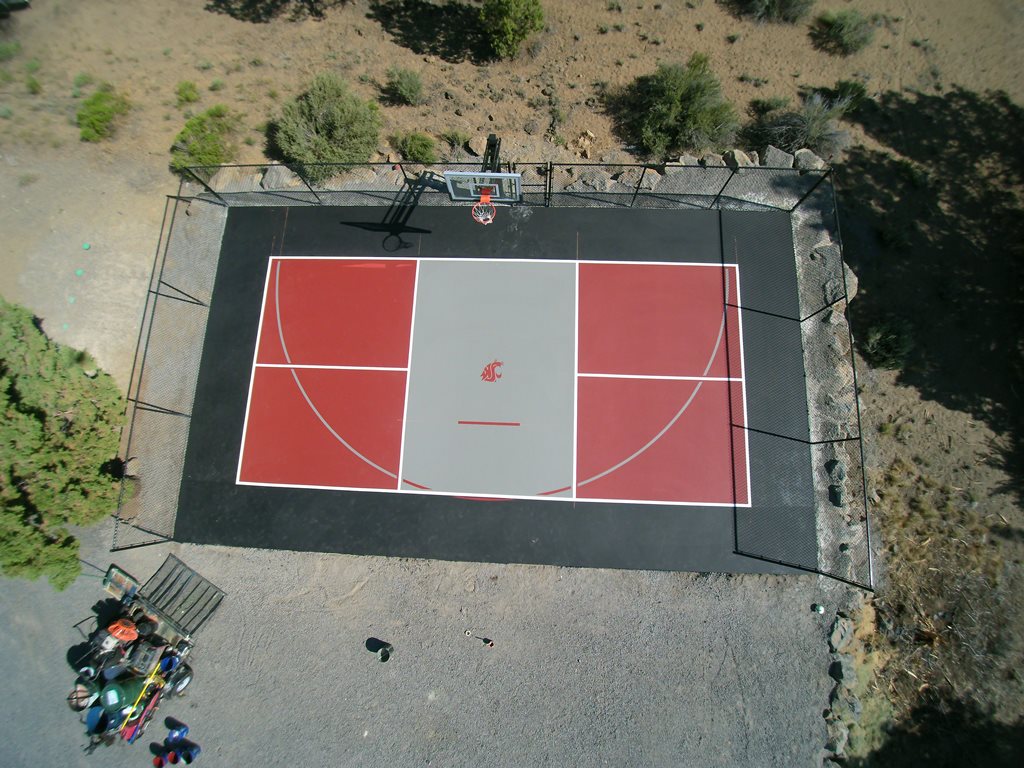
Pickleball & Basketball Court Combo

Combination Sports Courts | Pickleball Paint

If you are painting a court for pickleball, it is easy to add blended lines for other sports too.  A common trend is pickleball/basketball courts.  These are courts that don’t take up a large footprint, so they can be squeezed into many areas like backyards, driveways, playgrounds, and more.  You can use temporary nets for pickleball and then have the basketball goal on the courts edge.

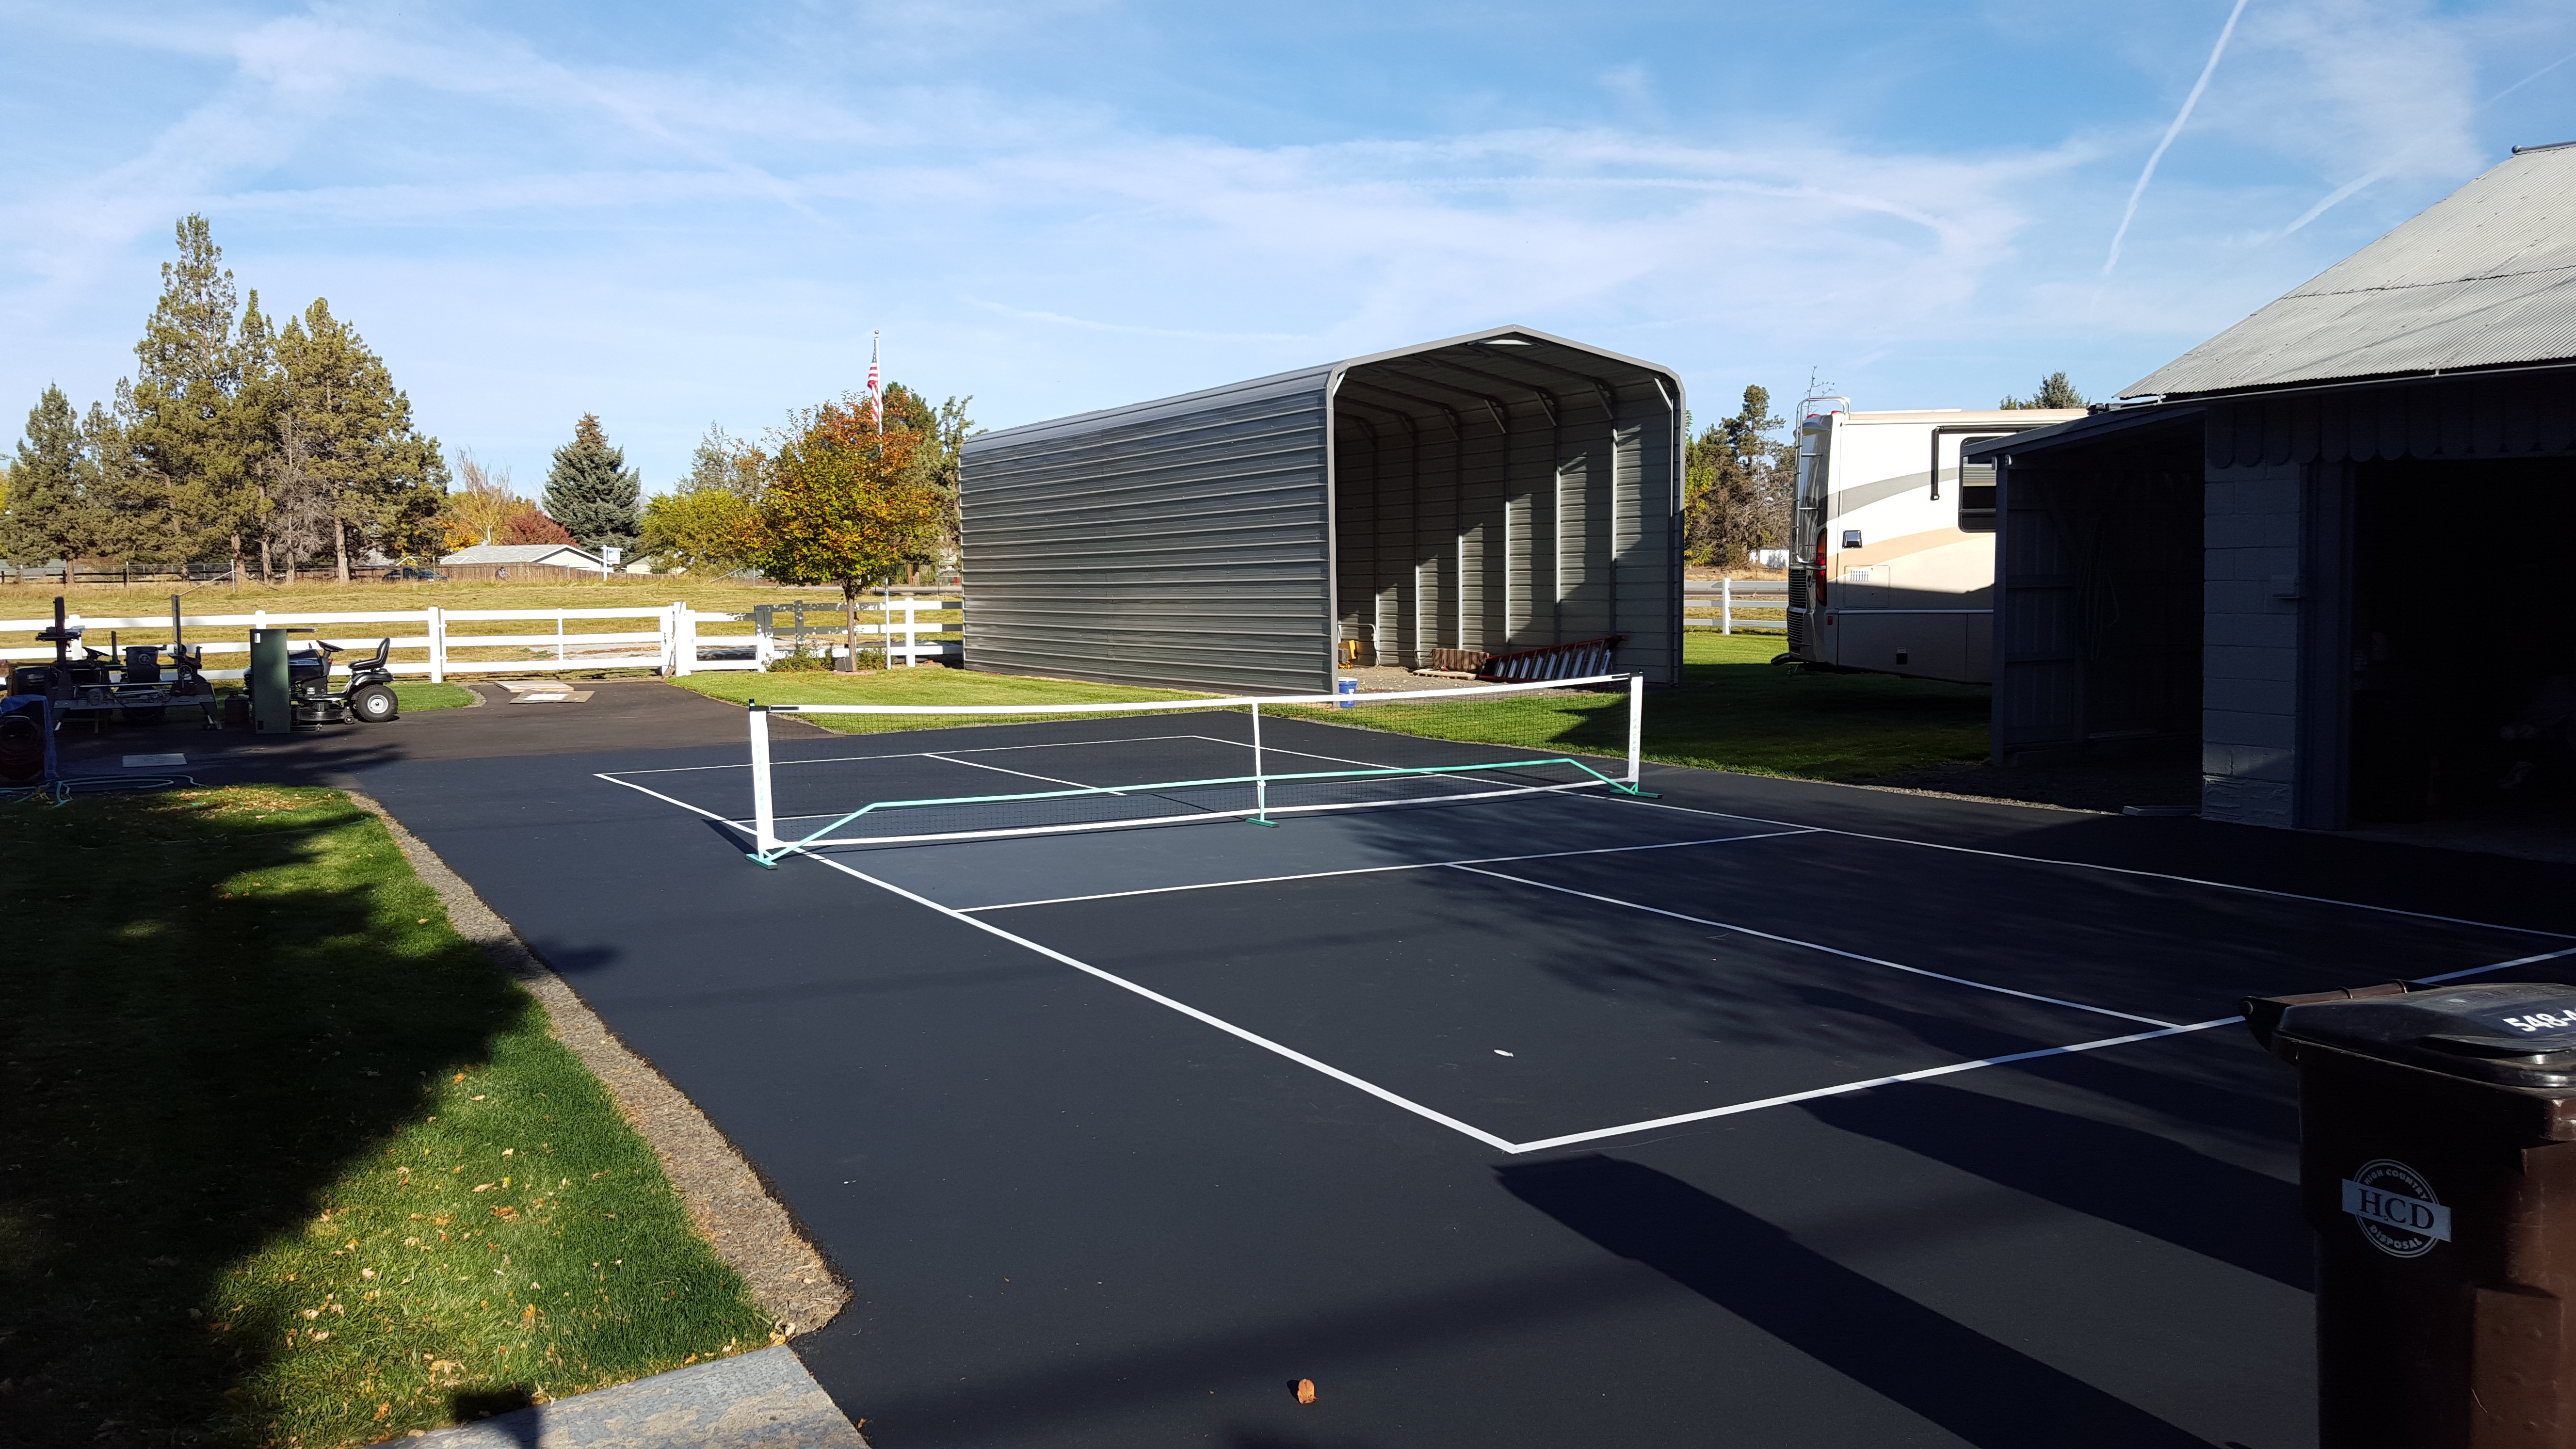
Here is a good example of a driveway pickleball court:

Driveway Pickleball Court

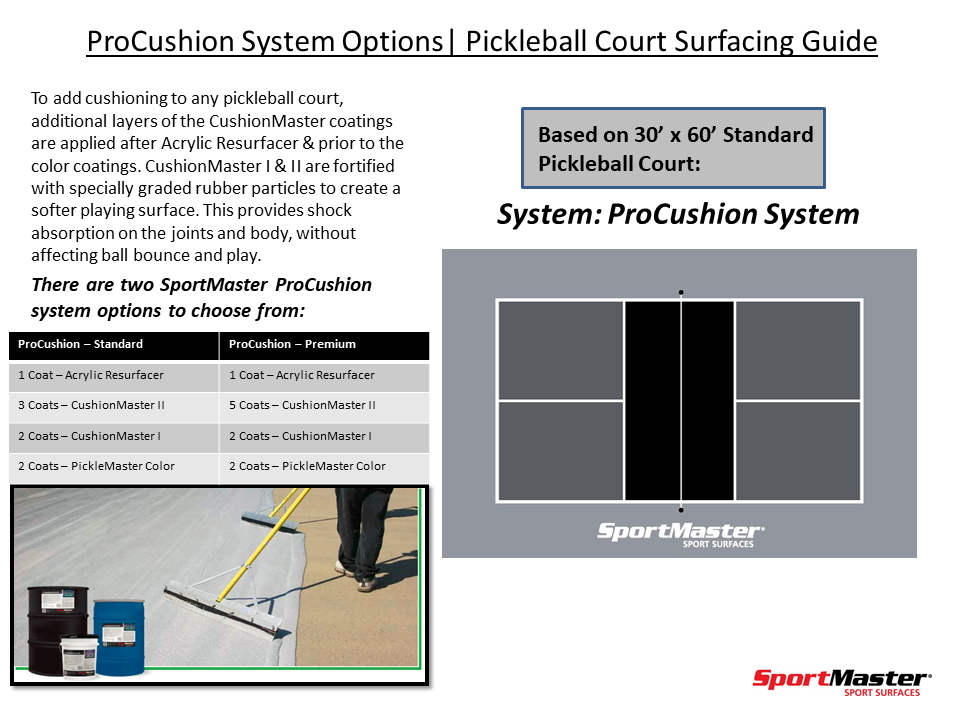
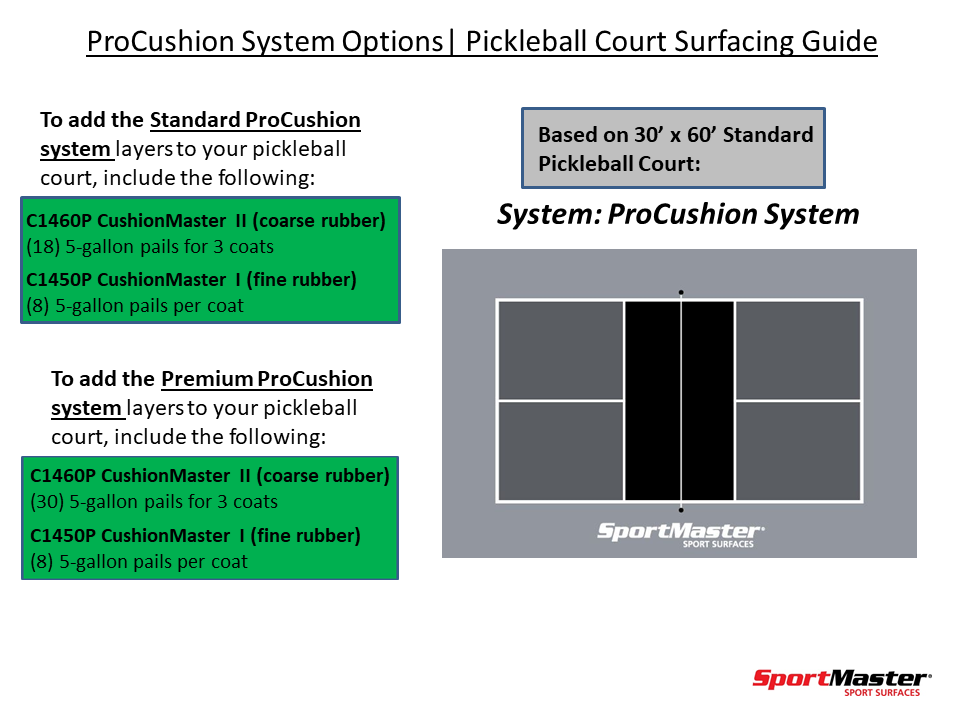
Cushioned Pickleball Courts | SportMaster ProCushion

A third option can be adding rubberized layers to get a cushioned pickleball court surface.  Multiple layers of acrylic with small rubber granules are applied with a soft rubber squeegee, beneath the color coatings.  This produces a pad of rubber under the court to absorb shock and improve player comfort.  Make sure to ask the installer to provide an alternate quote for cushion, to see if it fits into your budget.

Free Estimates | Pickleball Court Contractors

In summary, painting a pickleball court can be performed with a roller, but best when applied with a sport squeegee. For best results, we also recommend hiring a qualified sport surfacing contractor. They are trained and best suited to apply sport coatings, and repair cracks, puddles, and other surface damage prior to the paint and coatings.  Contact us today for referrals to experienced installers.

DIY Pickleball Surfacing & Paint Kits | PickleMaster

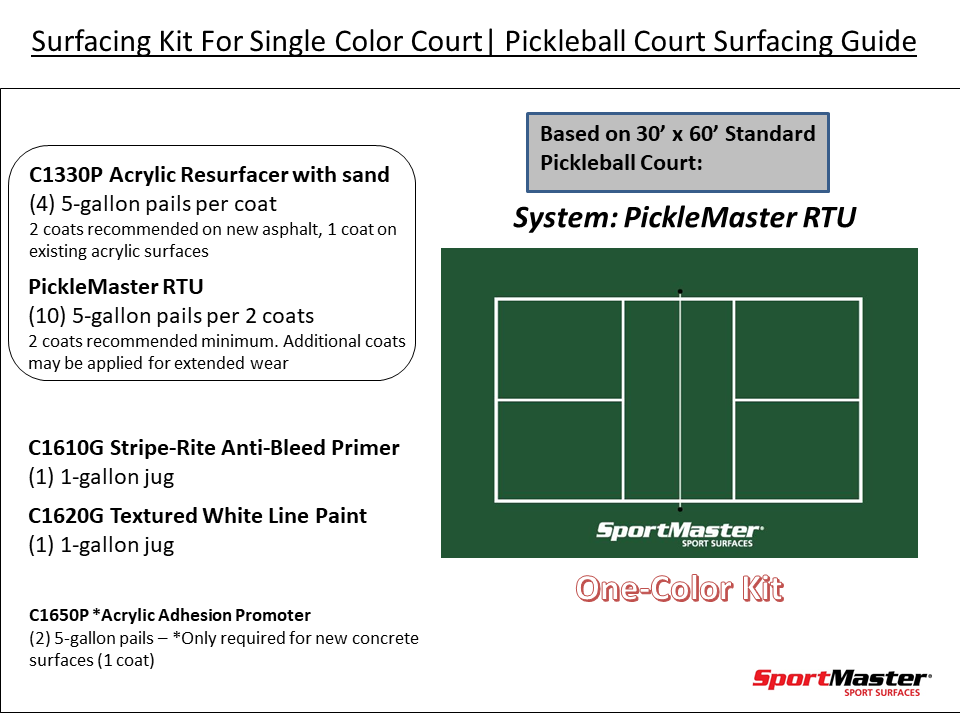
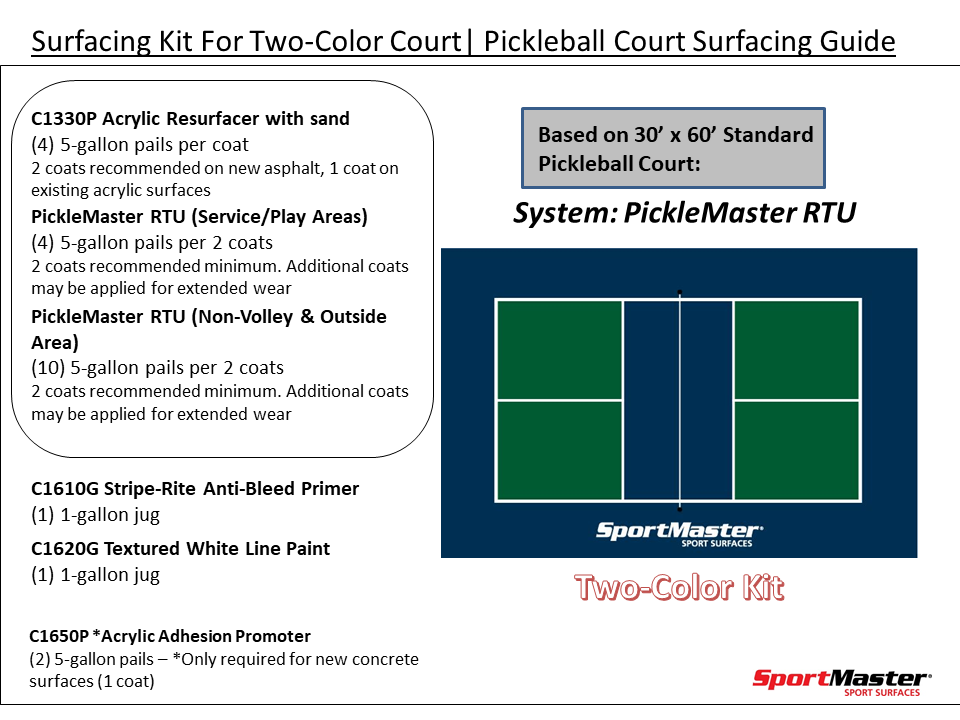
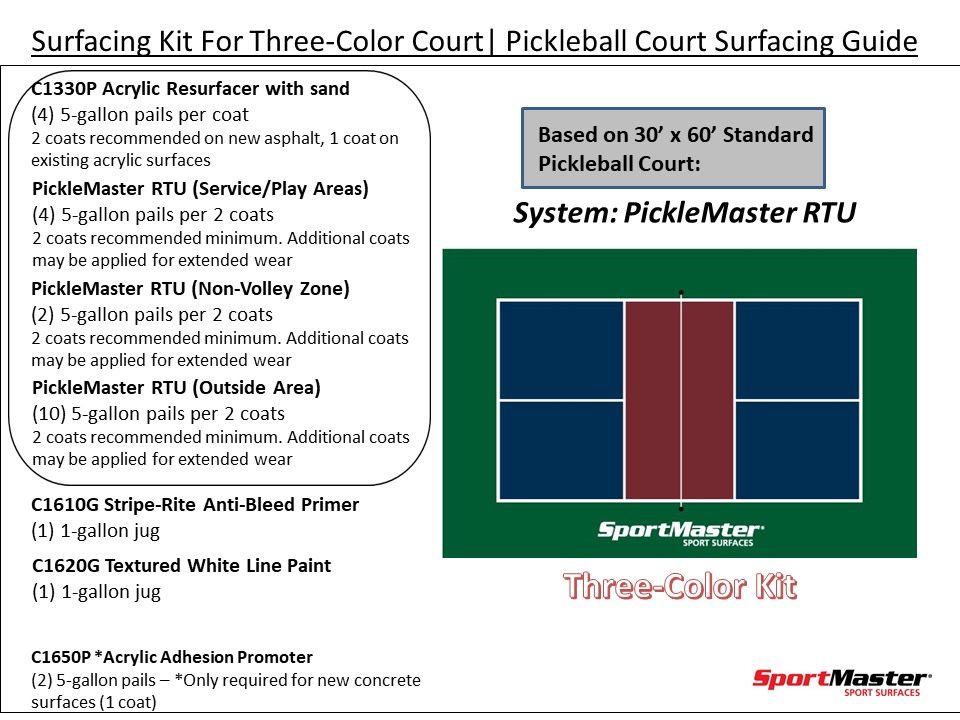
If you are up for the challenge of applying PickleMaster on your pickleball court surface, here are some material estimate kits.  Each varies based on the number of color zones you prefer:

If you are interested in adding cushioning to your pickleball court, the SportMaster ProCushion layers can be installed beneath the PickleMaster surfacing layers to create a softer playing surface.

#pickleball #courtsurfaces by #SouthwestSportSurfaces

A post shared by @sportmastersportsurfaces on